GitHub Exercise
Overview
The purpose of this exercise is to provide support for students who may be less familiar with Git and GitHub. After this exercise, students should be able to use Git and GitHub for their teamwork in this course and other projects. Students should know about the Git workflow and how to collaborate with other developers in their projects.
Note
This exercise is optional and is meant to provide a sandbox environment for students who want to practice using Git and GitHub tools. Students should use their own discretion on whether this exercise is helpful or necessary to support their learning.
Prerequisites
- You have a GitHub account
- You have Git installed
- You have Python 3 installed
- You know Git Basics
Forking a Repository
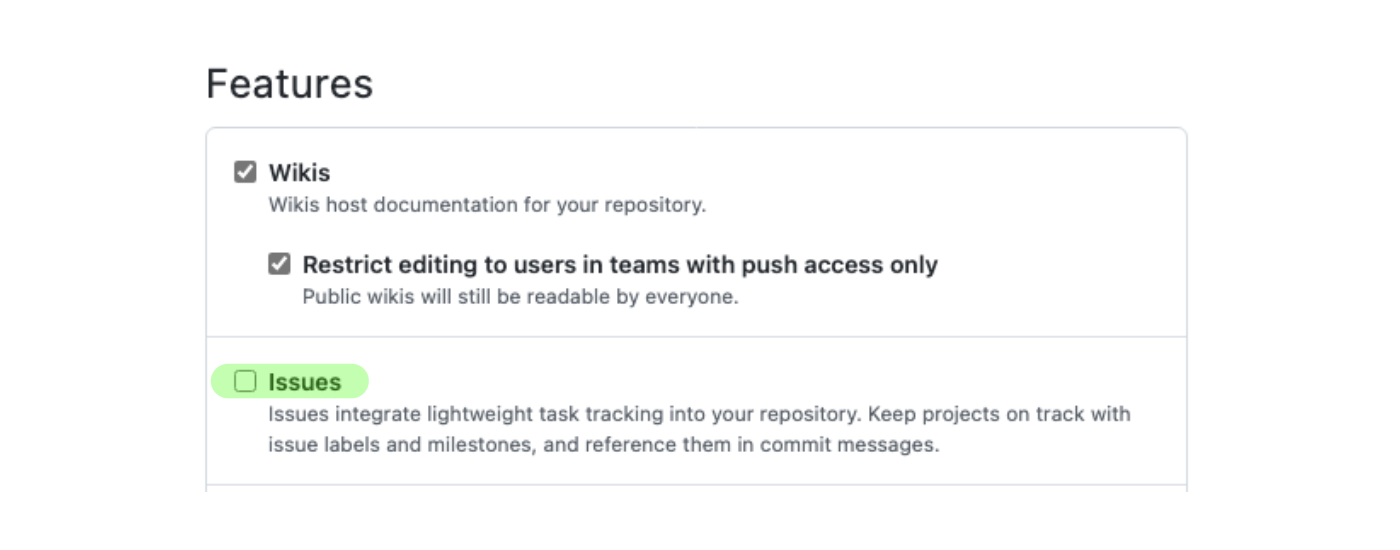
Start by forking this repository to your personal account by clicking the Fork button at the top of the page. Then, under the General tab in Settings, check the "Issues" checkbox in the "Features" section to enable the issues pane for your repository.
Clone the repository onto your local machine.
Running a GitHub Action Workflow
On GitHub, click the Actions tab, enable workflows by clicking the green button, then select the "Python Application" workflow. Click on the "Run workflow" dropdown. Double-check that the selected Branch is main, then click the "Run workflow" button. This manually will run the GitHub workflow that tests the Fibonacci function in fib.py using test_fib.py.
Once the action has finished running, click into the workflow and select "build". You should notice the action failing, meaning the test cases failed and our main branch is broken! Let's walk through the process to fix these errors.
Tip
In practice, you should not merge code into the main branch that could cause it to fail. This way, we can ensure that all the code on the main branch represents our most recent fully-working product.
Setting up a Project Board
Project boards are a great way to track development. Although there are many nice external tools such as Trello or Jira, GitHub provides their own project boards for us to use with great integration support of their other features.
Under the Projects tab, create a new project with the "Board" template. After the board has been created, go back to the Projects tab and link the project board to the repository.
Creating Issues
Check back on the build output in the Actions tab and take a look at which test cases are failing. Take note of the names of each test case - they should give you a hint as to what the bugs may be!
Under the Issues tab, create an issue for each failing test case.
Issue Guidelines
Issues titles should provide a high-level overview of what the problem is (e.g. "Navbar button UI bugs", "Unexpected registration validation errors"). Sometimes, issues are used to propose new features (e.g. "Add CSV export feature").
Issue descriptions should then elaborate on the title. For feature-level bugs, this may include providing information about how to reproduce the bug; for codebase-level changes, you can name specific files.
Assign yourself to one of the issues and add the two issues to the project Kanban board under the "Todo" column.
You may also want to experiment with adding labels and milestones to your issues. These are all features you will be using in future projects!
Branching, Committing, and Pushing
On your local machine, create a new branch with a relevant name to the issue you are addressing.
Branch Guidelines
Branch names should be short and provide a description of what you will be doing on that branch (e.g. "fix-header-sizing-issue", "fix-multiple-dialog-bug", "add-sorting-feature"). When working with others, you can also append your username to signal which branches are yours (e.g. "313ta/add-sorting-feature").
Fix the issue that you were assigned to, then add and commit the changes.
Commit Guidelines
Commits should start with a verb and provide a description of what they are doing to the codebase (e.g. "Remove faulty condition from getCustomerDetails", "Fix failing CompositeTestCase", "Fix issue #21" ).
Push the branch to remote by running:
% git push --set-upstream origin <your-branch-name>
Writing Pull Requests
On GitHub, create a pull request to merge the changes from the branch you have just pushed to the main branch.
Warning
Make sure you are merging to the main of your own forked repository! By default, GitHub will select the original repository (CMU-313/...) instead of your own forked repository (your-username/...).
Give your pull request an appropriate title and description.
Pull Request Guidelines
Pull request titles should describe what high-level changes were made to the codebase. Generally, they give a concise summary of all the commit messages.
Pull request descriptions should describe what changes have been made in more detail and how the changes have been tested.
Link the issue you created initially to the PR by using the linking keywords in the PR description, then click on the green "Create pull request" button.
Notice that the GitHub action workflow runs automatically once you create the pull request! You should check that the relevant test case to your fix now passes.
Check GitHub Actions
Click on the Actions tab. If you have resolved all the issues correctly, the tests should now pass, and a green check should show.